Pages

11/13/2014

Thursday-Lydia

Hey everyone! This weeks theme is What's In My Bag/Purse/Backpack. So I'm going to show you.

This is my favorite purse, I take it with me everywhere.

In the front pockets I keep two bottles of hand lotion, two lip balms, hair elastics and oil blotting face paper.

Inside the purse I have my favorite sunglasses, a pen, hand sanitiser and a compact.

I also have my wallet inside. It has money, coupons and various cards (library, Sally's beauty club, etc.).


I hope you all liked this post. Thanks for reading :) ttyl


xoxo,
Lydia

11/08/2014

How to Paint a Galaxy Painting +Tips!


Hola everybody! Happy Sunday! :)

So by now, you may know that I LOVE watercolors! I just love how it looks. I mean really, just stunning! 

So beautiful!

I am obsessed with eyes! They are so pretty!

Ooo la la! This is gorg!

Why can't I paint this good???

Awwww! :)


But, right now, I'm just painting a galaxy with water colors.

So first, the colors I use in my galaxy is black, purple, pink, white, blue and a little red here and there. You can look up some galaxy pictures on Google for inspiration. 

For the stars I used a old toothbrush to flick white paint onto my picture. White watercolors is hard to come by so, you can use Acrylic for the stars. 

This is the watercolor painting that I painted.

I used the Filbert brush but any paint brush looks good.

Tips

-Keep your water clean. If you just painted in a dark color and then you try to paint in bright white (Like, for the stars), it will effect the color. Your water doesn't need to be crystal clear the whole time but it's a good idea to keep it somewhat clear.

-With watercolor paint, a color will look more intense (darker) when it's still wet. But, it will dry lighter and paler. So, I like to add a few layers over my previous layers to make them more vivid. 

-Sometimes, watercolor paper curls up. This is really annoying and doesn't look nice. My oldest sister taught me how to prevent this. Tape! Just line the paper all around so that it dries flat.

I hope these tips were useful to you! Ciao!


Flashback Saturday


This weeks theme-obviously-was "Art". Originally, I was planning on posting some of my photography pictures (as that has been what aspect of artistry I've been most interested in as of lately), but I'll save that for a different day.
Today I'm going to show you some of my past drawlings; bear in mind though, that I drew them when I was 11/12 so they aren't that good. 
Okay, that being said, here are some of my old pictures:

I used to hold up my left hand in whatever position I wanted, and then draw with my right; which, I remember, was sort of difficult. 


I saw a picture online of this fox, and had decided to try and recreate it. Of all my pictures from when I was little up until now, this is one of my favorites.

 A lot of people enjoyed this one, but I remember not actually putting a whole lot of effort into it and always being surprised that it was liked so much.

||

I have a lot of other pictures, but I'll leave you with these three.
Thanks for looking/reading!
-Jordan Sky (Jordy)


11/07/2014

Friday - How to Draw a Face

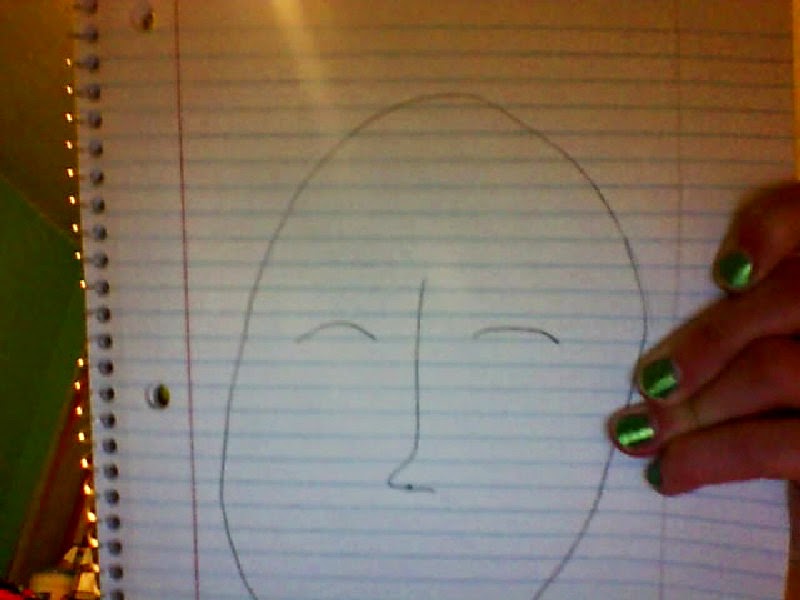
 Hi guys! Guinea Pig Lover here, and today I'm going to do a tutorial on how to draw a face-yep, just a face. Sorry, that's all I am at least decent at! Anyway, you are going to start out by drawing a oval for the head(well, duh) like so:
That is step 1 by the way...Step 2: add little curved lines about a little higher than the middle of the oval.
Step 3: Draw the nose. I draw my nose like this, but you can draw it however you want. Don't forget the nostrils!
Step 4: Complete the eyes. You can do this by making the curved line a sideways oval and then adding the iris and pupil. That's what they're called, right? Add color if you want to. I also added eyelids, but you really don't have to do them if you don't feel comfortable doing those.
Step 5: Add lashes. Do this by making little tiny slightly curved lines right on the top of the eyes. Make them how long you want.
Step 6: Create eyebrows. Just about where my nose starts at the top, do the eyebrows on the sides of it. You just want to do little strokes of pencil until they are full and worthy. :D You can add color to this whole thing, but I recommend pencil and then coloring in later. Don't be afraid to erase!
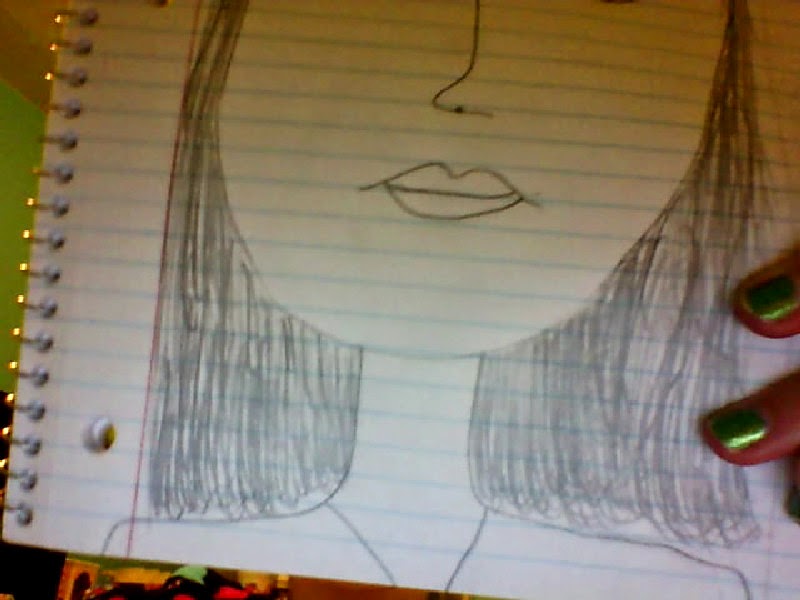
Step 7: The mouth needs to be created as well. To me, the mouth and eyes are the hardest parts of drawing a face. The eyes have to be the same size, and the mouth can't look to big, otherwise it will ruin the whole face! So this is how you do the mouth. Draw a long, curvy "M" like this...
Then, do a slightly curved like on the bottom like so...
Looks more like a mouth, eh? Well, now you draw a line in the middle that is really, REALLY slightly curved.
Voila! You got your mouth! Now, on to the next step!

Step 8: Draw the neck. Since you won't be putting in a body, all you have to do is draw a small stump and the tips of shoulders. Really simple. It should look somewhat like this:
Step 9: Hair, freckles, glasses, or piercings. This is how you should do hair...
In this case, I am drawing long hair with side bangs, let down. So all you really want to do is to do short strokes of the pencil, and do whatever style you want. 
I filled it in a lot, but if you are going to color the hair, you really only need a couple strokes everywhere.
If you are going to add freckles or glasses, then you just add dots under the eyes for freckles and draw glasses...

Step 10: Finishing touches. You can draw a shirt line on the neck it you want, add color, or name the face! I'll add the shirt line and name it to show you...I also always add a date, so I can look back on it.
                                 
And the finished product...


So I hoped you liked this tutorial, and that you find it easy! Thanks for hanging out with me! Have fun! Bye!


11/06/2014

Thursday-Lydia

Hey everyone! Since art is the theme this week, I decided to draw a picture of the Seven.

(left to right) Sophia, me (Lydia), Jordy, Meghan, Guinea Pig Lover, Adelaide and Lydia Therese.

I know it's terrible...it's just something I quickly drew. I didn't bother with many details. Sorry if I got you totally wrong Sophia, Guinea Pig Lover and Lydia. I have no idea what you look like, so I just picked random hair colors and such. By the way Lydia's shirt says FOR NARNIA but you can't really tell in the photo. I had fun drawing those arms ;) If you can't tell we're all hugging. I was going to have Jordy doing bunny ears behind Meghan's head, but it looked weird. I hope you like it, girls! :D ttyl

xoxo,
Lydia

11/05/2014

How to Draw Manga-ish Eyes - Wednesday

Hey everyone!

So, I really like manga/anime style of art. So I'm going to show you how to draw manga eyes! Not exactly manga or anime, but it is similar. LOL. Here we go!
Start by drawing an upside down U. Then draw a line across the empty space. 

Then draw 2 straight lines down near the sides, but make sure there is still a little space between the two lines. 

Then draw a small oval starting from the line. Draw a smaller one below it.

Color the inward space in. 

And your done! The end! :P

~Lydia Therese~ <3

11/03/2014

The Inner Artist...Strong or Weak?

Hello everyone! I'm Sophia, and I'm new to this blog. *everyone looks around awkwardly* So, this week's "Posting Theme" is art. I, personally, am a horrible artist. I can barely draw a stick figure. *shocked face* But, I'd like to ask you: How strong is your inner artist?

This is personally my favorite kind of art:

Snap a pic


Cute.


for some reason, i feel like drawing this.. haha  Cute!


Watercolor Painting - Kids art- Cute Pink Cupcake Art Print, 8x10 Wall Art. $15.00, via Etsy.


Smile!


'Horse Art: "DesignsbyDannie"' - Flattered that Likit Products shared my watercolor and ink painting "July"!


Images via Pinterest.


Now, I drew none of these. Like I said before, horrible artist!! :) Although, that doesn't mean I don't appreciate artwork...


Watercolor wash ~ Tulips
Via Pinterest


That pic is cute, sure, but it's not my style.

So, I'll end it with this:

Are you a good artist?
What kind of art do you like?
Did you like any of these?


Xoxo,
Sophia


11/02/2014

Watercolor Surfer Painting Tutorial


Hello everybody! Meghan here! Today, I'm going to show you how I painted this surfer painting. I painted two of these for my beach inspired bedroom. And now, I'll tell you how I painted it!

First, I went to Pinterest (LOVE Pinterest!) and looked up some female surfers for the silhouette.


For my two paintings, I used this surfer for this painting.

And my second painting..


(This is Lisa Anderson)

Next, I cut out their shape and taped it to my paper. Now, you can paint with the watercolors any colors! I tried to do blue with a mix of the colors in my room.

And Ta Da! That's how I created my surfer paintings!

Till next time!

-Meghan